Showing posts with label Harley Davidson India. Show all posts

Thursday, March 17, 2016

Upgrading your Harley.- Updated 01/2017.

UPGRADES

*Some sections updated- Jan 2017*

With the monsoons approaching/receding, the long zonal rides are upon us. It is time to get you bikes out of their hiding places and put on some miles or start thinking what you could do when you take them out after the rains.

A few riders on the last ride were asking me about the various upgrades and accessories available to us. I have broken this into four parts for this writing:


a.       Lights.


Upgrades on the main headlight is usually to the preferred Daymakers from HD. A direct fit, and a quick job. The light beam is very powerful and lights up the road pretty well. An added benefit to most of our daytime warriors is that it increases your visibility to oncoming traffic by a thousand times- and also makes you very easy to track, when you are in a group ride. There are afew riders who have complained about the dawn/dusk hours and the effectiveness of the same when its raining. Do not throw out your old headlight, if the rains bother you, then switch to the regular lights for 3/4 months of the year.
Additional Fog or Auxiliary lights are a boon in our kind of traffic allowing for more light to be ‘laid’ on the road making it safe to ride. These can be mounted along side the headlight or on the crashguard. Always make sure that you use these with a relay and get your wiring checked by someone at the workshop. This is the weakest link in the reliability of HDs.
Cheap Chinese made ones are available, and then there are some super gorgeous ones like the Clearwater Simple faults and shorts cause bikes to fail on highways- and your little effort towards saving money can result in a huge loss of riding opportunity and the cost of getting your bike shipped to a nearby service station.
HD engine management system is very smart and the new CANBUS detects the drop in wattage and equates that with a bulb being fused. Hence if a 15W signal light is replaced with a 3W LED light, the EMS could register that as a fault and keep prompting you to check an error code. Moany HD LED light fittings come equipped with a resistor and therefore work more on brightness and safety rather than trying to protect your battery.
The Fat Boys alternator system is 439W @ 13V,- and you can get upgrades to a 50 Amp alternator for about $600- so when adding lights, we find many bikers run short on juice to sound the horns and find the battery prematurely wearing out- many a times this is because of the load of the 55W from headlight, twin 60W (total 120W) Erica Clearwater fog lights etc that tax the electrical charging systems, while maybe a cheaper 36W+36W Krista would have helped.
Hence it is important to know some basics of your bike, or ask around till you get some reasoning behind your bikes limitations on upgrades.

b.      Exhausts


This is a tricky one. Choose an exhaust that you have heard on the same bike as what you own. Do not buy a particular exhaust because it sounds good on a Sportster. The Sportsters are the nicest sounding bikes, in my opinion but on the FatBoy, the same brand could sound just like distant thunder. So do not choose by name/style or recommendation. Choose because you heard it. Slip ons are changed at the far end of the header pipes, while ‘full system’ ones are ones that change from the exhaust port. Make sure that the full system pipes have Oxygen sensor ports drilled in, as if you have to do it, you could drill too close to the exhaust port and you could burn off the sensor filaments.
The usual suspects for an upgrade are V&H’s, Arlen Ness, Cobras to the more exotic SuperTrapp and Covingtons. The pride of Indias HD was a CFR on a Night Rod- which won any exhaust battle, hand down, till the police surrounded the owners house at 4AM on a Sunday- but that’s another story. Unless its radical change in exhausts, the slip on do not usually need a fuel management system.
c.       Air intakes
Stage 1 from SE is the best upgrade to a better breathing air filter element. Also, it comes with a very long life and only needs regular maintenance (as opposed to replacement for the OE air filter.) Various other more aggressive breathers are available like Heavy breather Screamin’ Eagle of HD, VO2/Drake/Duke from V&H, and the Big Sucker from Arlen Ness. These are the ones that protrude out into the oncoming air and feed the engine with more air, almost like ‘forced air induction.’


c.      Fuel Management Systems


Once you have altered the exhaust profile (mostly making your exhaust a freer flowing one) and given your bike more air than it could handle with its basic ECU, the air intake and exhaust sensors start to keep correcting this imbalance that is beyond their parameters to handle. So what?
SEPST from HD is the factory choice for FMS. The SEPST comes with a orange coloured interface that gets mated to ONE HD. One specific bike, not the owner. So when you sell that bike, you give the SEPST away. Given that its an authorized product, it is used to flash the ECM with no moving parts to ‘hang around under the seat.’ The drawback is not this- the drawback is if you mix components like a V&H exhaust with a Heavy Breather, you are essentially out of depth and you will need a Dyno to tune in your bike. This mix and match is very possible and finding a Dynamometer with a SEPST trained tech will be impossible. Which means you are jammed. Call your workshop advisor for pricing on this item. If not the service center tech geek, you need to be like this ‘tech head’ mariner from Pune who could really work wonders with the SEPST. Incidentally the SEPST was declared illegal and HD paid a whopping million dollar fine and no longer can you see the SEPST on their website- atleast I could not locate it.
With the SEPST attached and in recording mode, you will need to run the bike with throttle position from 0-100, and thru ever gear, which means that in 6th you could touch about 160- which is why the Dynamomter was needed in the first place. OR you can take a few riding lessons on how to ride with it atached and then ride your bike and ride it to whatever your speed on the highways is. Then return and use that SEPST software to flash the new curve onto your ECU.
FP3 from Vance and Hines is a very popular upgrade, relatively cheap, easy to install, and with a huge database of products to mix and match.  This takes the map from a table that will come with your FP3, or if you have some eclectic mix of parts, then you email them, and in about 72-96 hours V&H will email you the new maps, which again- can be done by yourself.
Power Commander would be the more advanced version of a piggy backed system that alters the ECU output and based on preset maps that you key in, the bike runs. A lot of people are happy- globally with this PC-V, which is the current version on sale.In case of any engine issues, or for instant comparison you can just unplug it in literally 5 minutes and get your bike into stock condition again.
Power Vision – is possibly the most vaunted of the lot. It takes your maps from the dealer, and flashes the ECM with its new maps. There are many plus points to this like recording your ridng data and almost everyone who is tech’ interested in fiddling with the bike would have this. IF flashing your ECM worries you, then this is not for you. If you are going to be upgrading your bike on completion of warranty and the likes, then you should probably plonk in the dollars and get this.
*UPDATE- Jan 2017*
There are two HOGs now in western India, one in Mumbai and one in Nashik who offer the PV Tuners service. You buy the licence off the internet and approach them and they flash the 'tune up map' appropriate for your bikes set up (engine, air intake and exhaust) from PV onto your ECU and probably charge you a little extra as labour.
Now one step further in this would be to remove the narrow band O2 sensors and put in wide band sensors and run the bike while recording data (recorder available with the Tuners) and then use their software to 'iron out' the algorithm and flash it on your system and then refit your old sensors back. This again would entitle you to run your bike at all speeds while the recorder does its work. This 'whole treatment' would be the most ideal, but it does entitle some cost to offset the wide band sensors offered by the tuner/s.

What happens if you don’t do this FMS. The ‘out of syllabus’ oxygen intake (due to volumetric increase in breathing capacity) and ‘freer than before’ exhaust will cause your bike to start running lean and will cause ‘blueing’ of your exhaust headers. This is the first sign that all is not well in your bike. You will continue to ride it hot till one fine day you will burn your exhaust valve.

The article was written some time ago- and could be seasonally-challenged. I write this from various inputs- printed material and fellow riders mainly. I could be off the mark and would welcome questions or corrective feedback, if there are new tech developments on the FP3- like the now easier interface, and the super pricing as well as the portability (meaning you could sell it to another bike in your category and not be bound like with the SEPST or the PV), I could be blissfully unaware.

Also remember, when you do your homework- HD often does have warnings on its online and paperback P&A catalogs of what parts are necessary to be purchased with some parts.A small example would be you would need to buy rear foot pegs with the rear seat for a Sportster, and likewise a SEPST or an EMS would be recommended or made mandatory with certain air intakes and/or exhausts. Likewise you would be surprised that Sportsters need not have (though its a 'good have') an SEPST with upgrades to its exhaust system with a SE Shorty Mufflers, but just upgrading the air cleaner would need an ECM calibration.

Check under 'Description'- 

http://www.harley-davidson.com/store/se-stage-1-sportster-air-cleaner-kit-pa-18-2978207--1
http://www.harley-davidson.com/store/se-shorty-dual-slip-on-mufflers-pa-06-8050307--1

Questions are always welcome, and so are shortcomings.

Friday, October 2, 2015

Learn to Lean your motorcycle- Part 2

Contd. from http://beagoodrider.blogspot.in/2015/09/learn-to-lean-your-motorcycle-part-1.html

What did we do?

WARNING: I strongly recommend that you wear proper head gear, elbow padding, chest armour, knee guards, and ankle top boots- always- and even in Exercise 4- you absolutely must. 

Every ride do this

Strap up your safety gear, and every day, every ride follow these exercises. You can never tire of them, and even if you do the same road every weekend, try and better yourself. Be vigilant- be alert.
I meet riders who claim close to a million 'quality miles' which to me are a very good thing- but without the training for the basic evasion and the confidence of banking in first gear, the  reflex and trust you need in your control will gather rust. As with wearing gear- its very strongly recommended that you review exercises 4+5 listed below once a quarter with cones about 12' apart. You will come out a better rider. I know that.

Exercise 1- Chin Up

Pic 5- Chin Up
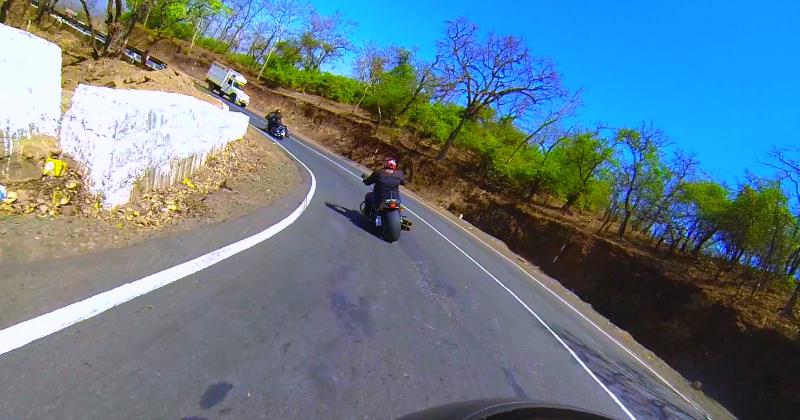
From the unending bends in Chorla (Karnataka, India), SD sent this picture- a beautiful illustration to show you to learn to ride with your chin up. Look in front. At speeds of 75-80Kmph (~50mph) nothing down is going to be of use to you if you have not seen it earlier. The arrow in the green is highlighting the place where your vision should be, thats what you should be preparing for. 
As you notice in Pic 5, the rider is already preparing for the lean and the more you study the image, the more you feel connected to the road and the upcoming lean, the bend and the line you need to take to make a safe run at that speed thru the turn. Again- readers in distant lands have to understand India had a plethora of 100-135 cc bikes for about almost 25 years before larger cc bikes entered the market. So we have a good class of riders in the 30-58 age bracket who have not seen potent high speed bikes in operation with their own hands. So everyone rode these 100cc bikes with their relatively sad brakes and hard 'high mileage' tires that lasted forever. And by now, they are just so attuned to staring 20' away due to habit, that the whole lean/bend circus becomes almost impossible to achieve. 

Exercise 2- Check Gear

Pic 6a- Looking down
The visual cues are indicators for your line of sight and NOT the line your bikes are to take.
See the cues in Pic 6a. I have used markers to show how many new riders approach bends, eyes down and not looking up. This will prevent you from adjusting your gear and checking your speed, and then there is this hurried action when almost entering the bend. And that is the most difficult position to be. Unenviable and not only that, your indecision will create unnecessary anxiety in the riders behind you, who will wonder 'What the hell is he doing? Which way is he going to go? Slow or wide?' All it needs is for two incidents like this for your fellow rider to lose his confidence in you, and then on be wary about your capability on every turn. It just eats away his joy of riding. Not a nice way to ride.
Scan the edges of the road- try and visualize yourself 10-12 seconds down the road. At 100kmph- ladies and gentlemen - thats almost 330 meters ahead or at @80 its about 260m.


Pic 6b- Chin up
So where do I want you to look- up into the far corners. Look at the cues in Pic 6b. How do we achieve this? By checking our speed before entering the corners. By following Exercise 1, we look ahead, we drop a gear, we come to 4th from 5th, or in this case, down to 5th from 6. Once in a lower gear you automatically gain traction on the rear wheel. And that allows you to control your bike better. Be wary that you do not drop too many gears at high speed- that you will cause wheel spin and get into more trouble than you imagined.
Being in control allows you to see what the riders would be doing- the lead has his eyes on the far end apex, the second rider- keeping an eye on the shoulder, watching the lead in his front-right while the camera bike has a direct line watching whats way ahead till his eye can see- enabling all three riders a fantastic view of the road at a speed well over the ton mark. If you want to take a bend this is the way- absolute calm. And yet with a lot of leeway to react, change track- if anything untoward were to happen.

Exercise 3 - Steady Throttle

Having looked ahead and gotten your speed under control to enter a bend- the most crucial part of the bend- to hold a very steady throttle and not 
a)let go of it and cut out the accelerator
b) yo-yo the bike with on-off throttle movements or
c) decrease the throttle, unless you want to power out and stop alongside the curve.


Pic 7- Steady Throttle

If you hold the throttle, the power stays on the rear wheel and your center of gravity stays in one place, slightly to the rear of the bike. The minute you let go, what happens is that you shift your load to the front and thereby loading the slimmer front wheel. This is what brought us to the overall exercise in the first place. The front then straightens up and if you do not have enough road to correct yourself, then you will run wide and crash, either off the road or into incoming traffic. 
As seen in Pic 7  the camera bike as held his line and a parallel bend to the leaders and with a clear sight of the apex. like earlier, if you study the picture, you see SR astride the Street Glide in a complete relaxed state of ride and with the bike in full control- 400Kg (about 800lbs) in full tilt- amazing- ready and anticipating any untoward intrusion in his line.

Exercise 4+5

Steering or counter-steering- I thought very hard about this- and I found this impossible to teach this. As it is riders are having trouble leaning are not achieving speeds to take corners properly. Leave alone concentrate on the bends in an enjoyable manner. They have no bandwidth to figure out the meaning of counter-steering and the logic that some riders use to explain/vouch for it. Once you learn to look up and search for your 'exit' and check your gear and get your bike in a steady throttle state- your steering will follow automatically.
Another issue that riders have is not being told/taught to exercise their elbows. Start doing the 'Figure of 8' and start in riding circles. Do three '8's' and three 'Circles' and then take a 100' ride in a straight line. Come back and do the 8 and the Circle in the other direction. Do not over do it to a point of vertigo and crash or fall.
On this 1914 Bailey Bridge outside Mumbai, SN and me managed to get the Fat Boy and the 48 in a ballet of sorts. Fantastic roll-on the road- desolate- no traffic.

Pic 8 Circling on the Old Bailey
The 'graduating test' if I were to design one- 12 cones, of which the first 8 would be the Slalom, ending in the 9th, and the figure of 8 run twice between the cones 9, 10, and 11- but inside 12.

What does your pillion do when you bank?

Often times you get asked this Q. And I say lean with the bike. Then often, you see people try and struggle and sit straight while some tragically funny ones actually try and lean counter to the rider. Here, as seen in Pic 9, Mr & Mrs RKa show the way- with the Mrs doing the perfect job on the rear seat.
Pic 9- Pillion- Lean into the turn
If you struggle against the lean, you will upset the flow of the bike and the vertical plane of the CG will then have an unnatural force acting on it.
The best way is to place your hands on your knees- for the pillion and then stay that way, so that the upper body sways automatically which ever way the bike leans.

Where do we go from here?

The inspiration to lean and bend has to come from somewhere- whether by learning or by riding alongside. I can think of none other than my #BombayHarrier brother SN, seen here in Pic 10, exploiting his 48 on a crowned road. Keeping his otherwise scraped foot peg read for the raised edge coming up. Chin up, throttle on, eyes on the apex.
The more you look at this- the more you want to get up, get off, check your tires and get leaning like him.

Pic 10- Bend it like 'Smokey'
-KD
#BombayHarriers

Articles on 'Managing Diabetes' and 'AIDS' @ http://therealslimkd.blogspot.in/


Wednesday, September 30, 2015

Learn to Lean your motorcycle- Part 1

Are you leaning at all?

There are a few dozen good articles on leaning/banking on Google and a dozen more on talking about steering- counter or otherwise. I thought of a unique approach to helping riders diagnose the fact that they have a problem (strange not many do acknowledge that) and then address it with visual cues.
Pic 1- DM holds the 240mm rear of a Night Rod in a perfect bank downhill
Why is a good lean healthy- for starters? A HD Road King turns when upright in about 24' whereas if you learn to lean you could do it in 20' and if you are really foot board scraping in the first gear- about 18' should be good. We tried this of Palladinos measurements- and a good rider or two can show how to shave of 1/3rd your turning diameter- which one day will get you out of trouble. I got my Fat Boy to turn within 22' and one day when I ride like Jerry, maybe 18' will be possible.
In Pic 1- you will see the reason for controlled banking and what happens if you were to lose your nerve. Physics will take over, you will use the front brake to slow down and that will shift your CG forward, load the front, unstablising the bike and causing it to straighten and run wide. This will take you into the path of the upcoming Jeep with potentially disastrous consequences.
Almost every rider upgrading from what was Indias staple 100cc bouquet of bikes has faces this situation. So what to do about this?

What are the aids available?

Assuming that you have the proper air pressure in your tires- you could then- start off. Visual inspection for banding is the first step and most important. Any sign of banding is bad news for the tire. It means that you will wear out one portion of the tire faster as you are causing all the wear/tear at that area only.
Strange that many would not know, but there are other visual cues available. There are a few kind tire manufacturers that have 'fun markers' on their tires and the KTM rear shown on a 390 is a perfect example. AR got this for me and highlighted in read are the lean markers that show how well you are banking on a tire designed to take banking.
Pic 2- Fun Markers on a KTM
Here in Pic 2 we see that the rider comfortably banks till level 4 (marked with the green,) which considering the predominantly urban use of the bike, is very good. I would dread to be touching 5 in Mumbai roads. Using these numbers as a guide, I feel the rider can tell how he has been running the bike, and if he has been using the gear box to its fullest potential- or if he has been running a gear too high or low- and therefore not maximising his 'control' potential to its fullest.
A regular check also enhances safety as you will notice that these tires are no longer the 25-30,000Km 'hard' MRFs that shod our Bullets and Hero Hondas of yesteryear but are now softer to enable bette cornering, high speed stability by also better braking to stop the bikes.

What do I want you to do?


 When you do to your bike, I want you to clean your tire with a dry cloth and see your rear tire. Closely.
A friend who has worked with me tirelessly on this topic volunteered his bike- more so because the improvement is actually visible :-) later in the article.

Pic 3- Straight up riding caused this banding
So what do we see here- a band of worn tire right down the middle (marked in red,) showing that the rider would be riding upright most of the time, and the shortcoming being the inability to lean- the reasons could be from the fear of falling- brought about by either a return to biking at a late age, inadequate learning, improper education, or in some cases, pure fear of leaning, fear of own capability or that of the bike itself.
Mine is to dwell in correcting this- not finding the cause.
So in highway riding, we see the slightly used areas adjacent to the Red bands in Pic 3. The outer band in green is this picture is a result of banking on highways runs and on easy long corners that are seen so often on the straight highway like NH8 going north  and then NH17 heading south of Mumbai- something like the gentle curves of I-77 South in the Virginias.

So what did we aim for?

Pic 4-  Huge improvement in utilising the width of the tire
We aimed for this- utilising the most of the rubber. as shown now in the green. The intent was not to scrape the knees but to enhance rider safety by encouraging him to
a) utilise the handing of the bike to a better degree,
b) use the gearbox better and
c) just be able to maneuver the bike in a more adroit manner.
d) get better tyre life out of your piece
The benefit for one would be- to be able to swing out of the way of a car that would stop right in front of you for no apparent or explicable reason, where your ability to move around him was the only possibility other than rear-ending him with damage to ones own bike. In but a few weeks of riding, the rider showed tremendous improvement in banking and how did he get there, well thats to be seen first in Pic 4. The central banding will not go away, and possibly a new tire when the tread diminishes would then see more even wear/tear the next time around.So this then becomes the right time to focus on spotting the problem and then working on it.

Once you have diagnosed the problem, then you head to Part 2 - how to go about rectifying it in three steps.
-KD
#BombayHarriers

Contd.
http://beagoodrider.blogspot.in/2015/10/learn-to-lean-your-motorcycle-part-2.html

Do read my articles on 'Managing Diabetes' and 'AIDS' @ http://therealslimkd.blogspot.in/

Tuesday, September 29, 2015

Importance of safety gear while riding- Dress for the Crash.

"Dress for the crash" and "You skin looks better on you than on the road" are slogans you hear every day or on the signature of many riders across Forums from Canada to Australia. 


This Sunday, on the Seven Islands ride to Igatpuri, about 110Km on NH 3 towards Nasik, we had an incident inspite of following a brilliant leader to sweeper team of 9 riders. 

Light drizzle, and absolutely just 'a' shower described the beautiful ride. Average speeds of 100-110 and light traffic with the absence of the usual jokers wanting to chase you to take pictures. The ride was as good as it could get.

So what happened next- Sachin, who was riding on a sweeping left hander coming down the Kasara Ghats, doing about 100- had a dog come across and his bike t-boned the dog- and Sachins bike fell to the right, into his angle of lean. The road was clear- no traffic, the Dog came from nowhere.

Amidst 10 riders, clear roads, dry downhill- fast- no reason to worry about gear- and that changed in a fraction of a second- and everyone who hit the brakes to avoid Sachins falling bike must have had their ways in blessing that everyone, save one, was dressed in almost as good as gear-cover can get.

Sachins crashguard- worked as his talisman- and it was amazing to watch for the 6 bikers behind him - that the FatBoy went skidding for about 25 meters or maybe more, before responding to Sachins endeavours to control the bike and it righted itself- and after stabilizing, the bike stopped about >100meters ahead of the stunned riders who braked to avoid running over the spill.

The rider was lucky, but the rider was geared well enough and i would even hazard a small bit that the subconscious knowing he was dressed well, allowed him to concentrate on regaining control rather than wondering which palm to ground to brace for impact.

Being involved with the Seven Islands Harley Chapter here in Mumbai, I get to see riders who come in, barely dressed for the ride, let alone for the act. It feels so distressing and patronising when you tell them that these bikes weigh a good lot more than themselves- and that this one-degree of comfort that possibly allowed Sachin to look more for control than brace for the crash saved him from a nasty spill.

The Crash guard, which almost every rider tells a newcomer to the group did its job. The safety gear worked at a mental level- It is so important. So Important.
-KD
#BombayHarriers

Riding in the wet- Monsoon riding In India

Ride Safe in the Rains
2013v

The first showers have hit the city and here are a few points for all of us to keep in mind for a wonderful riding season.
1. Invest in good gear- there is no substitute for good riding wear. A jacket with adequate padding at the shoulders and elbow and preferably on the back as well. Inner body armor like the kind made by Icon or Dainese would definitely be an added plus. Knee guards and above-ankle shoes, should be almost mandatory. Jackets come with detachable inner waterproof liners, make sure you carry them, the HD Sling Bag can do just that. If you examine good gloves, you will find they have a 'squeegee' kind of ridge on the thumbs that works wonderfully to clear muck and grit on the windshield.
Riding while wet and cold is one of the surest ways to fall sick- therefore it is imperative that you are adequately geared to ride comfortably.

2. Clean your gear- send your jackets and body wear for wash, along with your helmets inner liners. Look up the cleaning instructions for your gloves and similarly for your shoes. In case of an emergency clean gear makes it easier to remove and not to mention healthier for your own selves.

3. Mumbai has been hit by the first rains this morning- RAINBOW PATCHES- on the road are what you should look out for and study them on your way to and from work… The initial rains will eke out the sludge left behind by vehicles and all the oil and grease accumulated from last monsoon will surface- making the first week of riding in Mumbai a very tricky affair. The emergence of bubbles on the tire marks left by vehicles ahead of you is also another sure shot indicator of the surfactants and detergents added to fuels and indicating a very high 'slippery' quotient to the roads.
This not only will happen in the first week of monsoons, but also to a smaller degree in the first 10-15 minutes of every downpour through the season, so be careful- pull over and stop, get your rain gear on, and let the rains wash off the crud. Ride again.

4. Apart from rainbow patches, out government uses a very dangerous plastic emulsion paint with reflective capabilities to warm you of junctions, bridge ramps and speed breakers (Some of them atleast)- this plastic emulsion paint has a very poor coefficient of friction and will result in a slip or skid when you need traction the most- to slow down or stop. Please ride aware of these stripes in the city and more so on the highways.

5. Everytime you stop your bike and dismount- you should keep a cloth handy to clean your headlight, tail light and indicators. You will be surprised how the road spray hits the hot headlight and almost dries leaving a layer of dried mud on the glass. Even if you ride 5 mins in the rain, or on a wet road and dismount, please clean your lights.

6. When you are riding, and you see rainbow patches or small bubbles in tire marks, please very gently carry out a traction test. Tap both your brakes simultaneously and see how the bike reacts at the slowest of speeds. This will allow you to know the condition of the road as well as your ability to control the bike with the minor shivers that you may experience- better to know this in advance than to realize that the shiver i going to result in a complete loss of control.

7. While riding, remember to 'chase a taillight-' this will simply mean that you do not ride in line with someones number plate- this allows for two things- one is a good nd clear view of the brake light of the car in front, and secondly to allow you to swerve right or left to avoid hitting the car and giving you a precious few seconds to avoid contact or damage. Given the width of the brake lights these days, you can stay in that zone and avoid the spray from the cars tires, to a large extent- and if you think the spray is hindering your progress, you are too close to the car in any case. Back off.

8. Horizontal and Linear Seperation- is what I remind all newcomers when they ride for the first time- Do not chase in a line… When riding in a group, Never chase in a line. Keep in the same lane and ride in a staggered fashion- so this allows you to see obstruction or hindrance coming up fast and also what is it that is making the rider in front brake--- and if you notice its a dog running from right to left, you will know which way the biker ahead is going to swing to avoid it… and therefore those precious seconds to ensure your personal safety and that of fellow riders. The distances of H/L separation is best decided by your earlier checks for rainbows and bubbles- and of course the traction tests.

9. In turns- we do a few things on dry roads-
a) brake before the turn
b) steady throtte while entering the turn and
c) increasing throttle while lining up for the exit
d) Shifting body weight through all of the aboe steps
while it is raining, or on wet roads, restrict yourself to one of the above at a time- it may sound difficult to do, but even if you are able to remind yourself about it, your riding will be much safer than it used to be. It encourages caution and increases your awareness of the road condition, and almost forces you to pay more attention to turns, and this results in a better and safer ride for you and those with you.

10. On Group rides, be firm with these rules, they are for everyones’ safety. Riders who don't adhere to your group riding style, have the freedom not to ride with you, and also to lead and carry on on their own, without being an hazard to other riders who wish you have good time, rather than compete against the clock.
I wish all our riders a safe and wonderful monsoon riding season, year on year.
Ride safe.
-KD.
#bombayharriers


Upgrading your Harley

UPGRADES
With the monsoons receding, the long zonal rides are upon us. It is time to get you bikes out of their hiding places and put on some miles.

A few riders on the last ride were asking me about the various upgrades and accessories available to us. I have broken this into four parts for this writing:

a.       Lights.
Upgrades on the main headlight is usually to the preferred Daymakers from HD. A direct fit, and a quick job. The light beam is very powerful and lights up the road pretty well. An added benefit to most of our daytime warriors is that it increases your visibility to oncoming traffic by a thousand times- and also makes you very easy to track, when you are in a group ride. There are afew riders who have complained about the dawn/dusk hours and the effectiveness of the same when its raining. Do not throw out your old headlight, if the rains bother you, then switch to the regular lights for 3/4 months of the year.
Additional Fog or Auxiliary lights are a boon in our kind of traffic allowing for more light to be ‘laid’ on the road making it safe to ride. These can be mounted along side the headlight or on the crashguard. Always make sure that you use these with a relay and get your wiring checked by someone at the workshop. This is the weakest link in the reliability of HDs.
Cheap Chinese made ones are available, and then there are some super gorgeous ones like the Clearwater Simple faults and shorts cause bikes to fail on highways- and your little effort towards saving money can result in a huge loss of riding opportunity and the cost of getting your bike shipped to a nearby service station.

b.      Exhausts
This is a tricky one. Choose an exhaust that you have heard on the same bike as what you own. Do not buy a particular exhaust because it sounds good on a Sportster. The Sportsters are the nicest sounding bikes, in my opinion but on the FatBoy, the same brand could sound just like distant thunder. So do not choose by name/style or recommendation. Choose because you heard it. Slip ons are changed at the far end of the header pipes, while ‘full system’ ones are ones that change from the exhaust port. Make sure that the full system pipes have Oxygen sensor ports drilled in, as if you have to do it, you could drill too close to the exhaust port and you could burn off the sensor filaments.
The usual suspects for an upgrade are V&H’s, Arlen Ness, Cobras to the more exotic SuperTrapp and Covingtons. The pride of Indias HD was a CFR on a Night Rod- which won any exhaust battle, hand down, till the police surrounded the owners house at 4AM on a Sunday- but that’s another story. Unless its radical change in exhausts, the slip on do not usually need a fuel management system.
c.       Air intakes
Stage 1 from SE is the best upgrade to a better breathing air filter element. Also, it comes with a very long life and only needs regular maintenance (as opposed to replacement for the OE air filter.) Various other more aggressive breathers are available like Heavy breather Screamin’ Eagle of HD, VO2/Drake/Duke from V&H, and the Big Sucker from Arlen Ness. These are the ones that protrude out into the oncoming air and feed the engine with more air, almost like ‘forced air induction.’

d.      Fuel Management Systems
Once you have altered the exhaust profile (mostly making your exhaust a freer flowing one) and given your bike more air than it could handle with its basic ECU, the air intake and exhaust sensors start to keep correcting this imbalance that is beyond their parameters to handle. So what?
SEPST from HD is the factory choice for FMS. The SEPST comes with a orange coloured interface that gets mated to ONE HD. One specific bike, not the owner. So when you sell that bike, you give the SEPST away. Given that its an authorized product, it is used to flash the ECM with no moving parts to ‘hang around under the seat.’ The drawback is not this- the drawback is if you mix components like a V&H exhaust with a Heavy Breather, you are essentially out of depth and you will need a Dyno to tune in your bike. Very very unlikely. Which means you are jammed. Call your workshop advisor for pricing on this item. Or you need to be like this one ‘tech head’ mariner from Pune who could really work wonders with the SEPST.
FP3 from Vance and Hines is a very popular upgrade, relatively cheap, easy to install, and with a huge database of products to mix and match.  This takes the map from a table that will come with your FP3, or if you have some eclectic mix of parts, then you email them, and in about 72-96 hours V&H will email you the new maps, which again- can be done by yourself.
Power Commander would be the more advanced version of a piggy backed system that alters the ECU output and based on preset maps that you key in, the bike runs. A lot of people are happy- globally with this PC-V, which is the current version on sale.In case of any engine issues, or for instant comparison you can just unplug it in literally 5 minutes and get your bike into stock condition again.
Power Vision – is possibly the most vaunted of the lot. It takes your maps from the dealer, and flashes the ECM with its new maps. There are many plus points to this like recording your ridng data and almost everyone who is tech’ interested in fiddling with the bike would have this. IF flashing your ECM worries you, then this is not for you. If you are going to be upgrading your bike on completion of warranty and the likes, then you should probably plonk in the dollars and get this.


What happens if you don’t do this FMS. The ‘out of syllabus’ oxygen intake and ‘freer than free’ exhaust will cause your bike to start running lean and will cause ‘blueing’ of your exhaust headers. This is the first sign that all is not well in your bike. You will continue to ride it hot till one fine day you will burn your exhaust valve.

I write this from various inputs- printed material and fellow riders mainly. I could be off the mark and would welcome questions or corrective feedback. 

Learning from your Rides- KDs Motorcycle Diary

After a lot of Harley riding over the past 4 years, I have had some hard introspecting to do.
I graduated in bikes from the SuperLow to the Super Glide to the FatBoy where my liking for torqueand economics finally seem to have peaked.
I am more driven now by marquee rides. Signature rides- unique locations. Sequencing locations like no one has done before.
Riding to Dhule ten times a year or riding to Vapi five times a quarter to just add 5-700km a weekend- is just useless commuter riding to me now.
I restrict my riding to Igatpuri, Lonavala and then to Palasdari in the north. That's it.
After completing the Leh ride by car and then by bike- I see no charm in rides that I call pedestrian now.
Yes- so where is my problem? It is that I make new friends and they are where I was in India 4 years ago. Wanting to pound the streets and I looked at them- 'what boss? no vision, no dream.'
So wrong on my part.
Probably my peers also questioned my quick change of bikes equally, branding me as whimsical- at its most police. Probably my neighbours wondered- where does he go for five hours every weekend morning.
Over the past few weeks I have been thinking and all I have made peace with is- destinations and goals of other riders and mine will not match.
Rajmachi in the rains does not attract me. As much as the best road in India- Hyderabad to Bangalore, does not beckon me either.
The border roads of india- be it the 'no pillar zone' in the Kutch, the long forgotten Munnabao railway station, the Israeli grass and snakes in the sands of Longewala  sector, the wheat fields and the brave punjabis who live around BOP Khakian.
All the way to the riverine plains around Dhubri in Assam. I learnt- these may not turn on other riders. I learnt not to demand- and yet I learnt.
To let them sell their bikes till their economics and riding senses were filled.
To let them ride where they learnt to enjoy themselves- remembering good times with their fathers and friends on the road.
Not many have been machine gunned at on the LC while having a younger Officer say- 'park your bike this side, so those fools won't get a stray round into your paint.' But yet a samosa-chai stop in a torrential downpour in Bijapur with friends you have not seen in ten years, could hold more thrill.
I promise not to cringe or wince at the topic of an upgrade. I promise not to chew my lips at the sound of a destination.
I will learn to smile that I did all that.
Just a few months ago.